In our previous article, we have answered the question “How does Google Tag Manager work?” and have covered the basics of this service. Today, we want to expand this topic and provide our readers with the Google Tag Manager 2019 tutorial on how to track on-page YouTube video views and how to connect Google Tag Manager with Google Analytics to have the data at your fingertips.
Below is a detailed step-by-step instruction on how to begin working with a tool, setting up containers, variables, tags, and triggers for built-in YouTube video tracking. If after reading this tutorial you still have questions, don’t hesitate to contact us to clear things up.
STEP 1: Create an account and a container in Google Tag Manager
Sign up to Google Tag Manager using this link.
This is the screen you’ll first see when you get started with GTM:
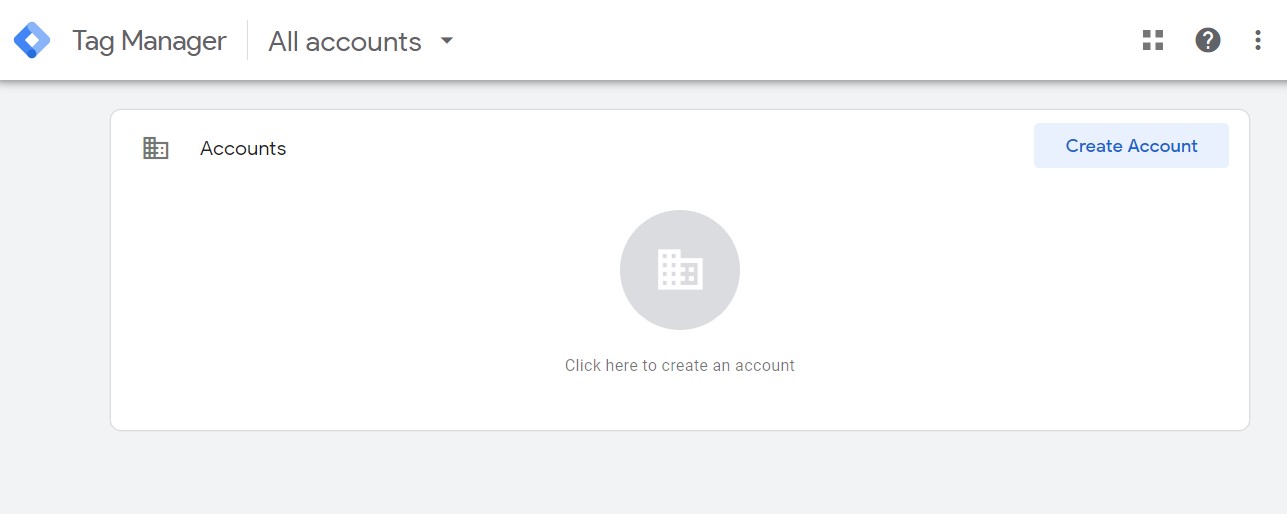
There is nothing confusing here, just proceed to create an account:
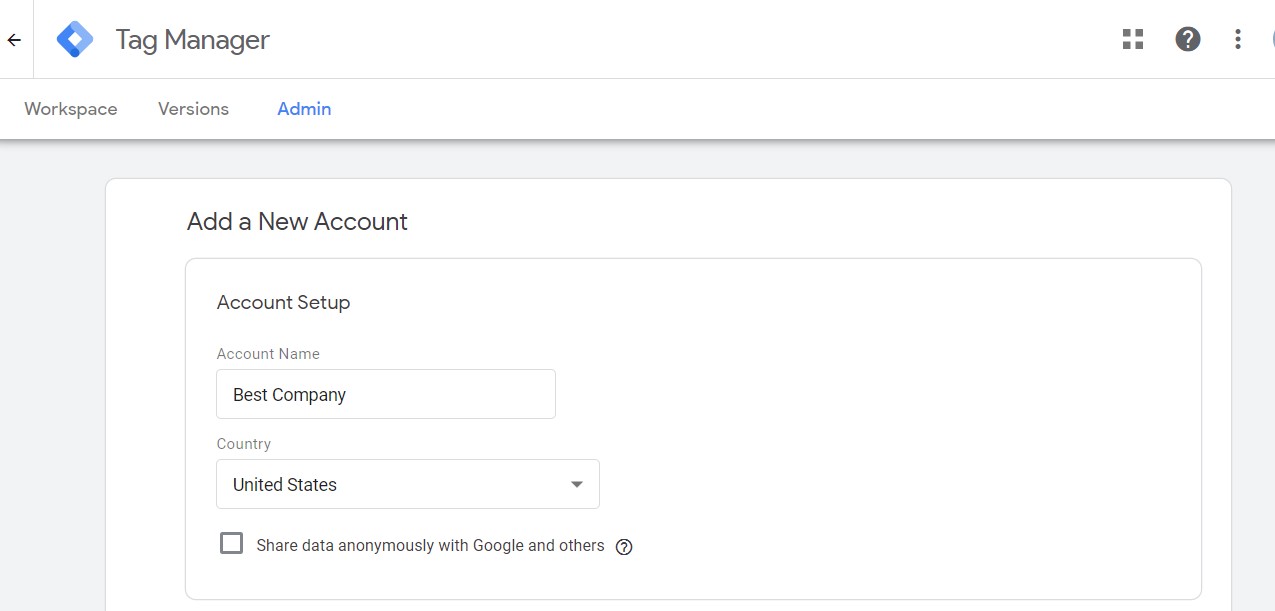
It’s typically recommended creating one account per company and naming it accordingly (our company is indeed the best one but in this case, it’s just an example).
And now we have to create a container that will hold our tags, triggers, and variables. The container name should duplicate or be similar to a site name where it’s going to be located. In our illustrative example it’s www.bestcompany.com:
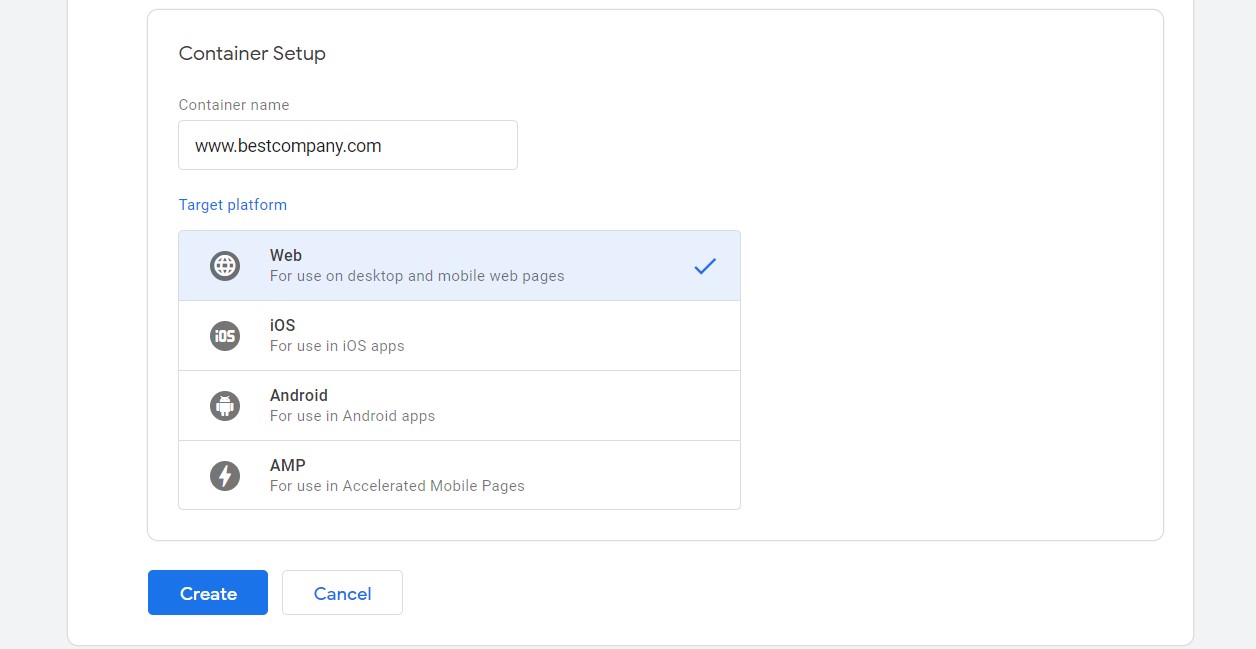
As to the target platform, since you want to track what is happening on your website, choose Web. Note that you can utilize GTM on other platforms such as iOS and Android on mobile and accelerated mobile pages (AMP) as well.
After clicking ‘Create’ you will be asked to review the GTM’s Terms of Service. Once you do this and click ‘Yes’, the setup process of your GTM container is done.
STEP 2: Implement the GTM container code into your source code
The pop up that you will see next is the GTM container snippet with two pieces of code that should be added to the source code of every page of your website where you are planning on deploying tags.
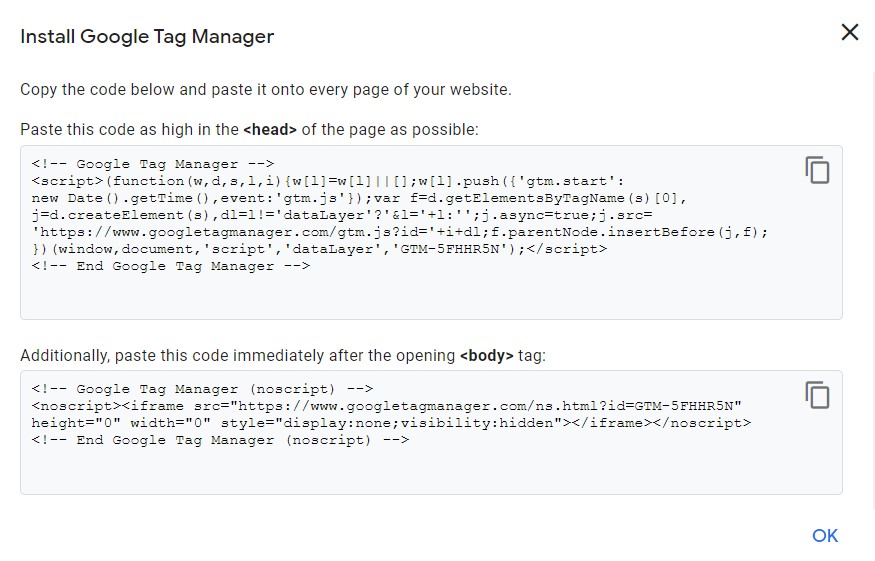
The upper and the lower parts of the snippet is a code that should be pasted at the highest of the
and sections of your page respectively. Ask your development team to help you with pasting these codes onto the corresponding pages or bravely do it yourself. If you somehow skipped this step, you can always go back to it by simply clicking on your container code: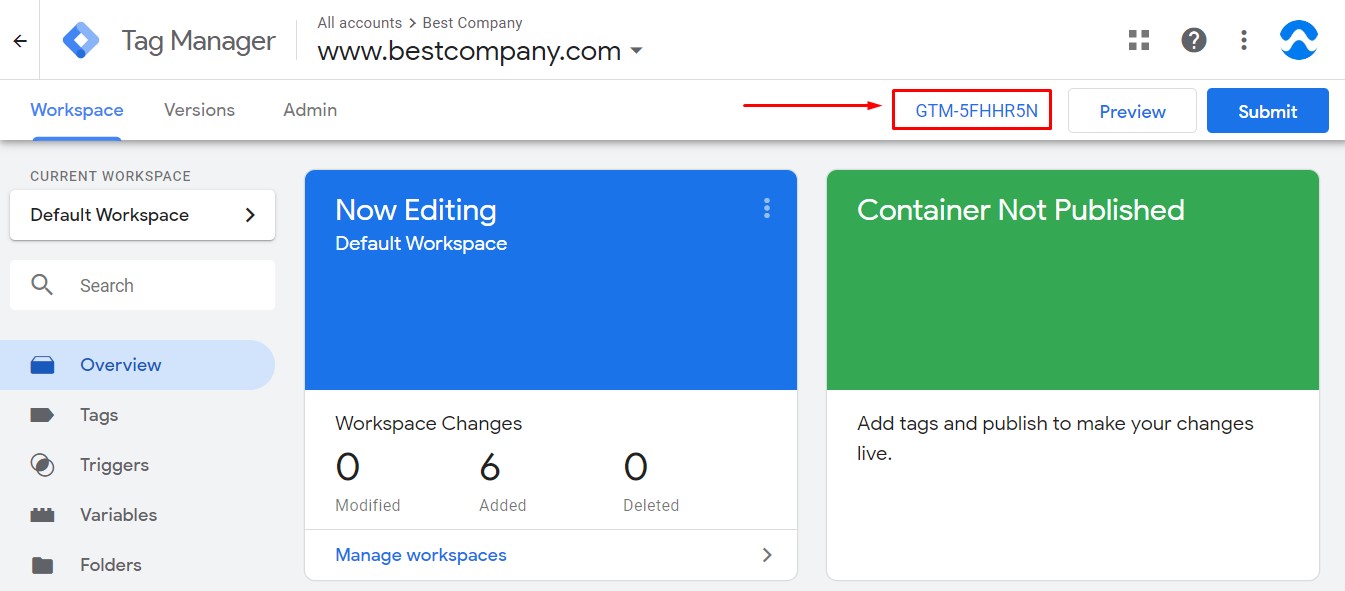
STEP 3: Create variables
Go to the Variables section and create 3 user-defined variables:
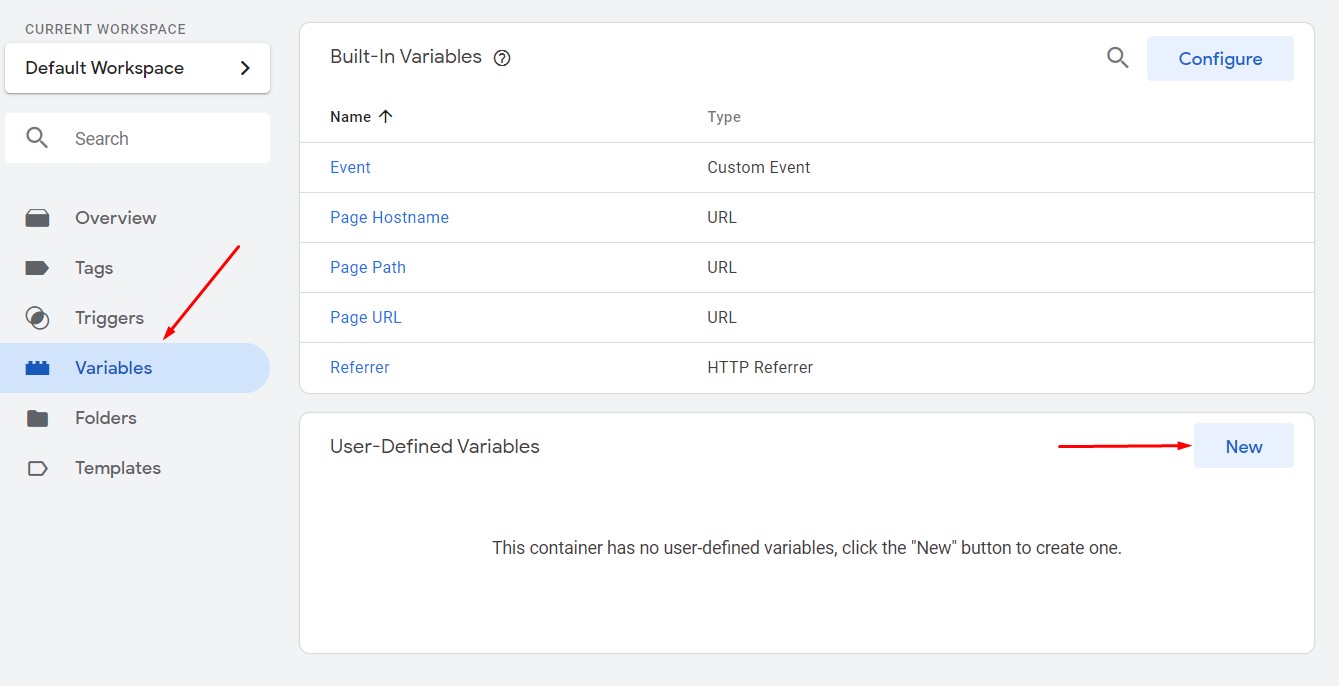
1.
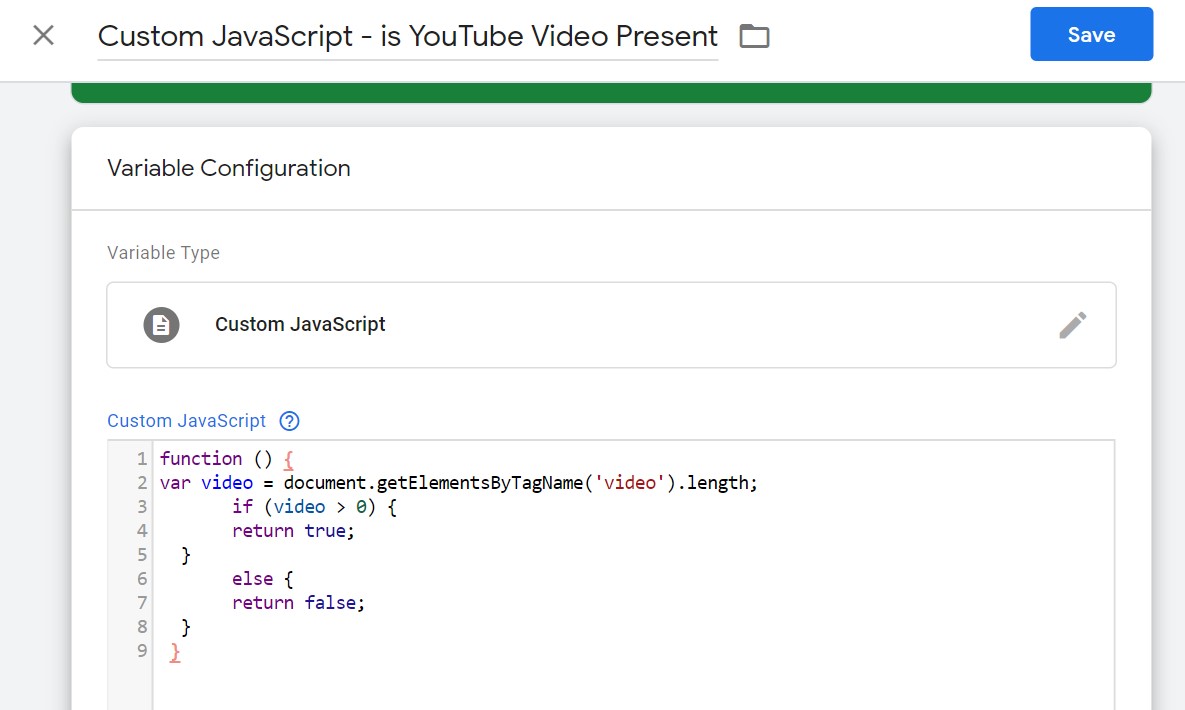
> Variable name: Custom Javascript - is YouTube Video Present
> Variable type: Custom JavaScript
Then add this code to the field and save changes:
function () {
var video = document.getElementsByTagName('video').length;
if (video > 0) {
return true;
}
else {
return false;
}
}
This script detects whether any YouTube video exists on the page.
Now you need to create two more variables but of a different type to be able to catch the video URLs and users’ actions on video.
2.
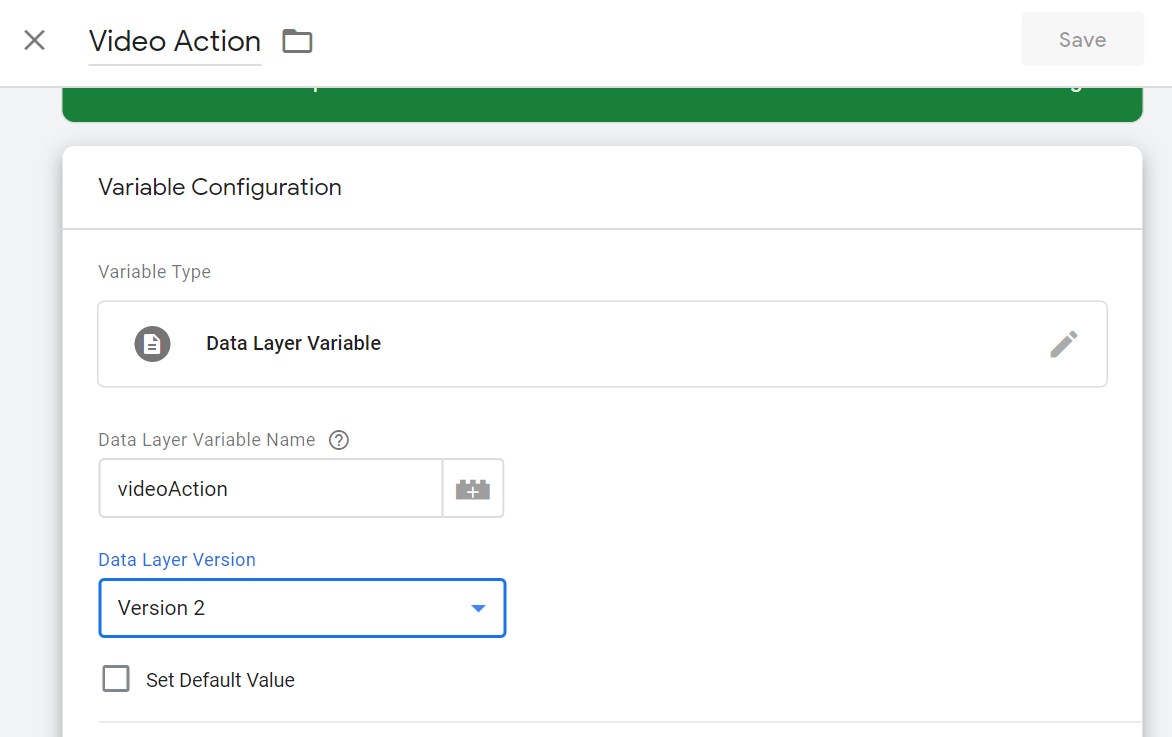
> Variable name: Video Action
> Variable type: Data Layer Variable
> Data Layer Variable Name: videoAction
> Data Layer Version: Version 2*
* It’s a default value for Data Layer Version and in most cases, it’s better left as it is.
For those who wonder, Data Layer Version is a way to specify for Tag Manager how to treat values in the data model. Google Tag Manager has set Version 2 as a default one for a reason: this version is more flexible, it lets you access nested keys and allows data merging whereas Version 1 will overwrite the existing data every time you push it to the Data Layer.
So, unless you know what you are doing, for example, you need to ‘clean’ Data Layer from previous values every time you push data to it, don’t change the Data Layer Version.
3.
> Variable name: videoUrl
> Variable type: Data Layer Variable
> Data Layer Variable Name: videoUrl
> Data Layer Version: Version 2
STEP 4: Create triggers
It’s time to create triggers that will listen to users’ actions on video and will have your tags fired up. In the left navigation, click Triggers and create two new entities:
1.
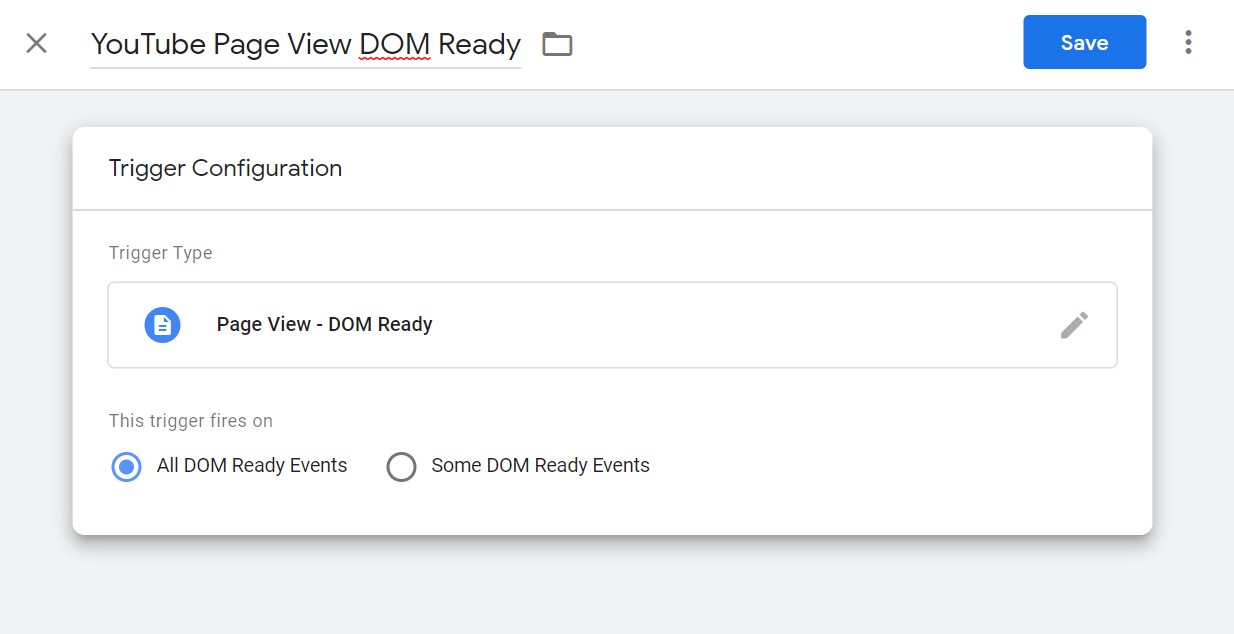
> Trigger name: YouTube Page View DOM Ready
> Trigger type: Page View - DOM Ready
Select ‘This trigger fires on All DOM Ready Events’
2.
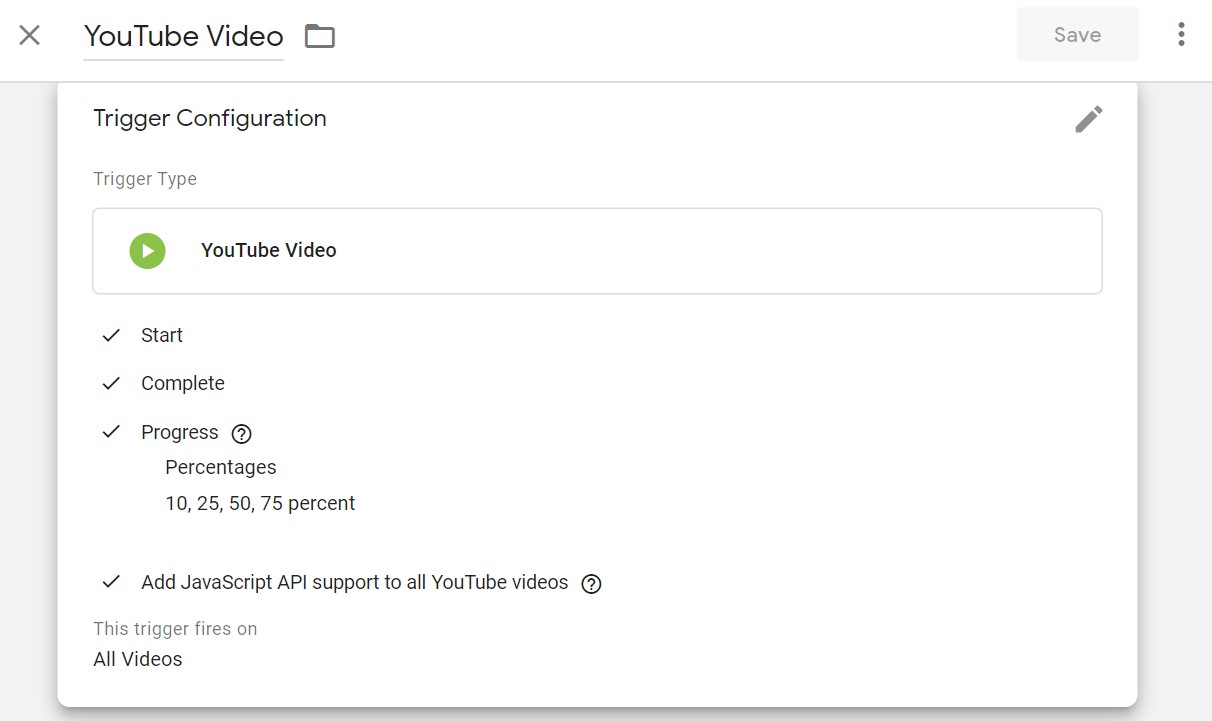
> Trigger name: YouTube Video
> Trigger type: User Engagement > YouTube Video
> Capture: check Start, Complete, and Progress boxes and specify percentages (10, 25, 50, 75 or adjust them to your own values) separated by a comma
> Advanced: check ‘Add JavaScript API support to all YouTube videos’
Select ‘This trigger fires on All Videos’
STEP 5: Create tags
Finally, we have arrived at the most interesting part of our Google Tag Manager 2019 tutorial: creating tags with a unique script for video tracking and connecting Google Tag Manager with Google Analytics account.
In the left navigation, click Tags and create two new tags:
1.
> Tag name: Dynamically Loaded YouTube Video Tracking Custom Code
> Tag type: Custom HTML
Then paste the script you see below into the HTML field:
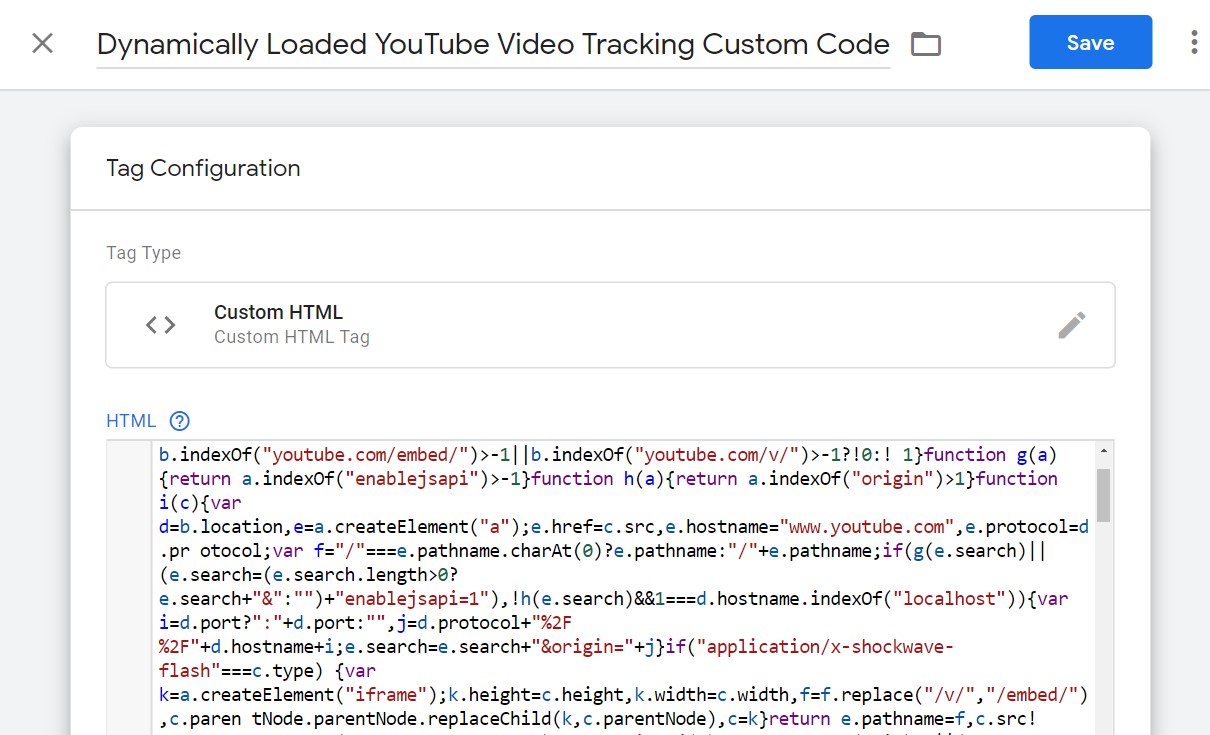
Without Google Tag Manager, you’d have to paste this script onto every page of your website where YouTube video exists. Now you can create a tag that will do this job for you.
Select trigger for this tag:
> Trigger name: YouTube Page View DOM Ready
The second tag will connect Google Tag Manager with Google Analytics and will be sending tracked YouTube events to GA:
2.
> Tag name: Dynamically Loaded YouTube Video Tracking
> Tag type: Google Analytics: Universal Analytics
> Track Type: Event
> Event Tracking Parameters: Category: Videos
> Action: {{Page Path}} | {{Video Title}}
> Label: {{Video Status}}|{{Video Percent}}
> Non-Interaction Hit: False
> Check ‘Enable overriding settings in this tag’ and add your Google Analytics Tracking ID
> Select a trigger ‘YouTube Video’.
If you are experiencing difficulties finding your Google Analytics Tracking ID, here is a set of steps that will help you with it:
- Sign in to your Analytics account
- Click Admin
- Select an account from the menu in the ACCOUNT column
- Select a property from the menu in the PROPERTY column
- Under PROPERTY, click Tracking Info > Tracking Code. Your Tracking ID is displayed at the top of the page.
STEP 6: Publish the container
We are all set, it’s time to publish the container. To do so, click ‘Submit’ in the top right corner of the screen:

You will be offered to either publish the container and immediately push changes to your site or save changes to review, edit, and publish them later.
Once you have published the container, you can check whether Google Tag Manager with Google Analytics are communicating correctly:
- Go to your Google Analytics account
- Click on ‘All Website data’
- Go to ‘Real-time’
- Go to your website and play any YouTube video
- Go to ‘Events’. In ‘Event Category’ you should see ‘Videos’ and in ‘Event Action’ you should see a link to the video you’ve played
- Click on ‘Video’ and if everything is okay, you’ll see the video views statistics, video status, and progress.
You can launch other YouTube videos on your website, skip to the end to see ‘Complete100’ status, watch half of the video to see ‘Progress50’ status or perform other actions to see how it will be displayed in Google Analytics.
STEP 7: Debug
Additionally, you can install the Google Analytics Debugger plugin for Chrome and set it to ‘On’ mode in your browser. Then to check whether the settings are correct:
1. Go to your Google Tag Manager account.
2. Click on Preview to enable Preview mode:
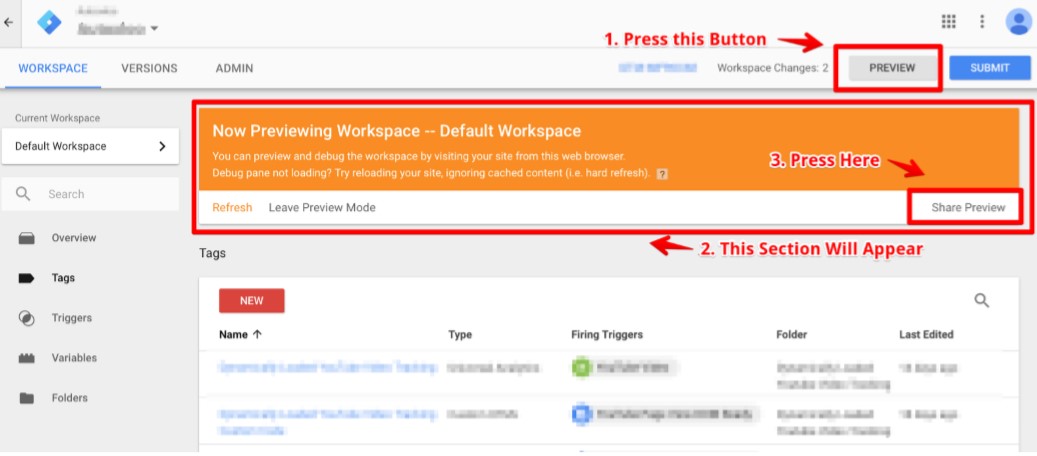
3. After each tag modification, click on Refresh and then on Share preview. The pop-up window will appear:
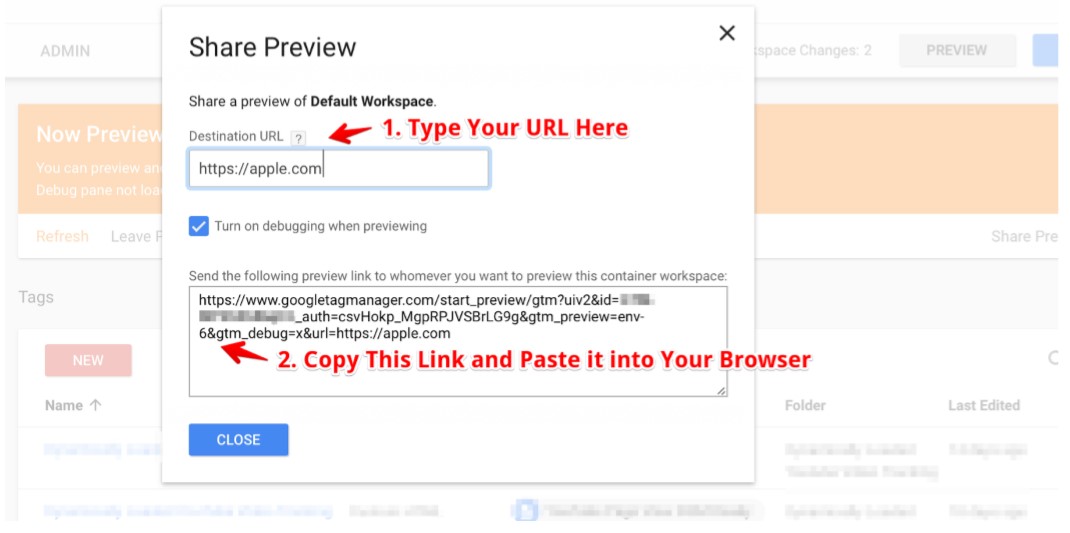
4. Copy your video URL and paste it into the ‘Destination URL’ field.
5. After the URL inserting, GTM will generate a link in the bottom field.
6. Copy-paste this link into the search bar.
7. The pop-up window ‘Preview Container’ will appear.
8. Click on the link in this window
9. You’ll see ‘Tags fired on this page’ and ‘Tags not fired on this page’ in the bottom of the page:

10. Launch your video again, and if you set tags correctly they will fire:
To see possible errors, click on Tag. You’ll see Tags, Variables, Data Layer, and Summary tabs. You can look through these tabs to find settings errors. For example, Unknown Variable or Unknown Label signal that something went wrong and you need to double-check your settings.
We hope this Google Tag Manager tutorial will help you to have more in-depth insights into your website video performance. As always, if you have any questions regarding the Google Tag Manager setup or any other GTM or GA-related issues, contact us in any way convenient for you.
Stay tuned to our blog for tutorials, tips, and recent updates on SEO, SEM, SMM, website and mobile apps design and development, business communication software, and more.
Last updated on July 18th, 2023


 Phone Consultation
 Request a quote
 Text a Message